This is the first post in a series that I plan to write about my OS project. All of the posts in this series are listed on the OS project tag page. The code for this project is published in my GitHub repository.
Disclaimer: I am a beginner when it comes to OS development, so some things that I write here might be incorrect. If you find any inaccuracies or have other feedback, please let me know.
Introduction
Around two months ago, I decided to try developing a simple operating system kernel from scratch. I figured that this would be a fun way to learn more about how operating systems work, and possibly help me learn kernel pwn.
Writing an operating system these days often means using the x86 architecture family and the C programming language, both of which are more than four decades old. While x86 and C have improved over the years, they are greatly limited by the need to maintain backwards compatibility. I figured that instead of working with 20th century technology, it will be more fun to play with a more modern architecture and programming language.
Instead of x86, I decided to use RISC-V, a relatively new open standard architecture that was originally developed at UC Berkeley. RISC-V is much simpler than x86, and using RISC-V means that I don’t have to deal with tons and tons of legacy crap such as boot sectors, real mode, protected mode, and segmented memory. Unlike other academic architectures, RISC-V is designed with practical use in mind. Many companies are working on RISC-V technology, and lots of RISC-V processors are already available or in development. Software support is also pretty good at this point, and I didn’t run into any major issues with that.
I chose the Rust programming language over C for somewhat similar reasons. While C doesn’t suffer from an incomprehensible amount of complexity like x86, it is still very old and I feel that Rust is much better designed.
Research
While I already had some existing knowledge of operating system development, I still had to to a lot of research before writing any code. I started with the RISC-V ISA specs which describe the RISC-V architecture. While these are formal specifications, I found that they were easy to read even though I had little prior knowledge of RISC-V. The specs had a lot of commentary explaining the reasoning behind all of the design decisions, which I thought was pretty nice.
I searched for tutorials on writing operating systems in Rust, and I found Philipp Oppermann’s OS blog which uses x86. While it gives a good overview of some high level concepts, I noticed that a lot of the details are hidden inside a pre-made library.
Another tutorial that I found was Stephen Marz’s OS blog. It uses RISC-V, but I found that it was not as applicable to my project as I hoped since I chose to do some things differently. For example, the tutorial doesn’t use any firmware and implements its own UART driver, while I decided to use the OpenSBI firmware included with QEMU, which provides functions for accessing the serial console.
Lastly, I used the Linux kernel source code as a reference, and I accessed it with the Elixir cross referencer which made it a lot easier to navigate the huge codebase.
Design Goals
Since this is my first time writing a kernel from scratch, I wanted to start simple and add more complexity later.
I will only be targeting the QEMU emulator’s virt board with a single core for now, and I will hardcode information about the target platform instead of obtaining them at runtime through mechanisms like device trees.
However, I still want to make my kernel similar to modern production kernels when it doesn’t result in too much complexity.
Initial Setup
Following Philipp Oppermann’s tutorial, I created a no_std crate with some minimal code that simply loops forever:
#![no_std]
#![no_main]

#[no_mangle]
pub extern "C" fn _start() -> ! {
    loop {}
}

#[panic_handler]
fn panic(_info: &PanicInfo) -> ! {
    loop {}
}
The tutorial compiled the code with a custom target specification, but I found that for RISC-V there’s a built-in riscv64imac-unknown-none-elf target that seems to be appropriate.
RISC-V instructions are organized into a minimal base instruction set and optional extensions.
riscv64imac stands for the 64-bit RISC-V base integer ISA with extensions for integer multiplication/division, atomics, and compressed instructions (shorter 16-bit encodings for common instructions).
Note that this does not include floating-point instructions, since they are usually not needed in a kernel and not using them avoids having to save the floating point registers during context switches.
I set the target in the Cargo config file .cargo/config.toml:
[build]
target = "riscv64imac-unknown-none-elf"
Linker Script
During my research I found that I needed a custom linker script in order to have more control over linking and specify things like the base address where the kernel will be loaded. Linker scripts are written in a domain-specific language defined in the GNU ld manual. They list the output sections of the linked executable and which input sections they contain.
I started with a simple linker script that includes the usual sections: .text, .rodata, .data, and .bss.
These sections contain executable code, read-only data, writable data, and zero-initialized data respectively.
OUTPUT_ARCH(riscv)
ENTRY(_start)

PAGE_SIZE = 4K;

SECTIONS {
	. = 0x80200000;

	. = ALIGN(PAGE_SIZE);
	.text : {
		*(.text .text.*)
	}

	. = ALIGN(PAGE_SIZE);
	.rodata : {
		*(.rodata .rodata.*)
	}

	. = ALIGN(PAGE_SIZE);
	.data : {
		*(.data .data.*)
	}

	.bss : {
		*(.bss .bss.*)
	}
}
I set the base address to 0x80200000, since the QEMU source code indicates that RAM starts at 0x80000000 and some of the memory at the beginning appears to be used by the firmware.
This is also the base address used by some of the other projects that I found.
To make the linker use my script, I made a Rust build script that sets the -T option:
fn main() {
    println!("cargo:rerun-if-changed=build.rs");
    println!("cargo:rustc-link-arg=-Tlinker.ld");
}
Some other projects used .cargo/config.toml for this, but a Cargo PR seems to indicate that using a build script is better.
One issue is that I couldn’t find a way to make Cargo treat the linker script as a build dependency so that it would relink after I change the script.
There also doesn’t seem to be an option to manually relink without recompiling everything, so I had to use cargo clean.
Booting the Kernel
In order for the kernel to be executed, it has to be loaded into memory.
While this is typically done by a bootloader or the firmware on modern computers, it looks like QEMU can load the kernel directly.
The QEMU man page indicates that there is a -kernel option for specifying a kernel to load.
For the format of the kernel, the man page only mentions the Linux kernel’s format and Multiboot, but with some trial and error I figured out that QEMU also supports the ELF binaries produced by the Rust build.
I added the following to .cargo/config.toml which allows me to run my kernel in QEMU with cargo run:
[target.riscv64imac-unknown-none-elf]
runner = ["qemu-system-riscv64", "-nographic", "-machine", "virt", "-kernel"]
As I mentioned previously, the firmware that I’m using is called OpenSBI. Before starting the kernel, it prints out a cool banner and some useful information:
OpenSBI v1.1
____ _____ ____ _____
/ __ \ / ____| _ \_ _|
| | | |_ __ ___ _ __ | (___ | |_) || |
| | | | '_ \ / _ \ '_ \ \___ \| _ < | |
| |__| | |_) | __/ | | |____) | |_) || |_
\____/| .__/ \___|_| |_|_____/|____/_____|
| |
|_|
Platform Name : riscv-virtio,qemu
Platform Features : medeleg
Platform HART Count : 1
Platform IPI Device : aclint-mswi
Platform Timer Device : aclint-mtimer @ 10000000Hz
Platform Console Device : uart8250
Platform HSM Device : ---
Platform Reboot Device : sifive_test
Platform Shutdown Device : sifive_test
Firmware Base : 0x80000000
Firmware Size : 288 KB
Runtime SBI Version : 1.0
Domain0 Name : root
Domain0 Boot HART : 0
Domain0 HARTs : 0*
Domain0 Region00 : 0x0000000002000000-0x000000000200ffff (I)
Domain0 Region01 : 0x0000000080000000-0x000000008007ffff ()
Domain0 Region02 : 0x0000000000000000-0xffffffffffffffff (R,W,X)
Domain0 Next Address : 0x0000000080200000
Domain0 Next Arg1 : 0x00000000bfe00000
Domain0 Next Mode : S-mode
Domain0 SysReset : yes
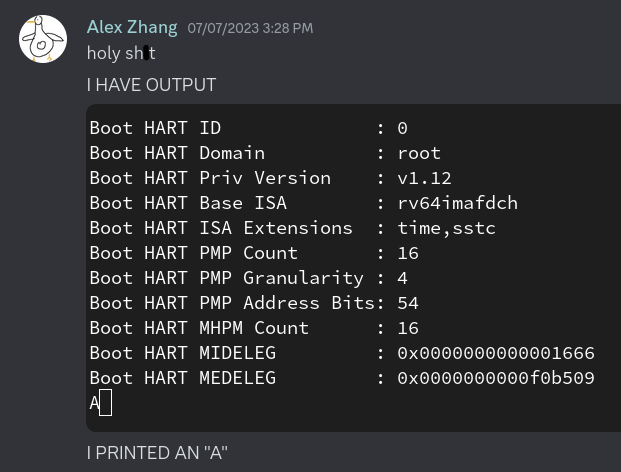
Boot HART ID : 0
Boot HART Domain : root
Boot HART Priv Version : v1.12
Boot HART Base ISA : rv64imafdch
Boot HART ISA Extensions : time,sstc
Boot HART PMP Count : 16
Boot HART PMP Granularity : 4
Boot HART PMP Address Bits: 54
Boot HART MHPM Count : 16
Boot HART MIDELEG : 0x0000000000001666
Boot HART MEDELEG : 0x0000000000f0b509
I hadn’t figured out how to get GDB to work yet when I was debugging this, so I used the QEMU monitor, which has commands for examining the state of the registers and memory. I was able to verify that the kernel was loaded and executed correctly this way.
Displaying Output
OpenSBI is the reference implementation for the RISC-V Supervisor Binary Interface (SBI), the standard interface between the firmware and the kernel.
The SBI provides an sbi_console_putchar function for writing to the debug console.
To call it, I just had to set some registers to the right values and then execute an ecall (environment call) instruction, which could be done with some inline assembly.
Implementing this only took a few lines of crappy testing code which I didn’t save, but it took a surprisingly long time for me to get it working.
One issue was that I was reading a pre-release version of the SBI specification and trying to call a newer version of the function that hasn’t been implemented yet.
I also misinterpreted the output from the QEMU monitor so the register values didn’t seem to make sense.
After figuring all of this out, I was able to output a single “A” character, which was quite exciting considering how much work it took to get this far:
I initially made the SBI call with inline assembly inside the _start function, but that broke as soon as I added more Rust functions.
It turns out that QEMU ignores the entry point address specified in the ELF header, and the kernel is always executed from the very beginning.
I also realized that I needed to have assembly code initialize things like the stack pointer before entering any Rust function.
Therefore, I moved the assembly code out of the _start function into a separate ELF section, and I modified the linker script to make sure that the section is always the first one.
Running Rust Code
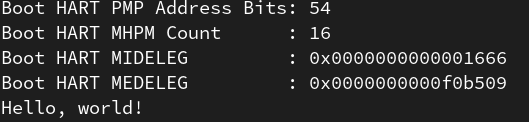
Now that I have output, my next step was to print “Hello, world!” using Rust.
I named the section containing the initial assembly code .head.text, and I put it in a file called head.S following the Linux kernel:
.pushsection .head.text, "ax"
.global _start
_start:
	.option push
	.option norelax
	la gp, __global_pointer$
	.option pop

	li sp, 0x80400000
	tail main
.popsection
In RISC-V, the gp (global pointer) register is set to an address near frequently-used global variables so that they can be accessed faster through this register.
Here I initialized it to the address of the __global_pointer$ symbol, which I defined in the linker script.
I somewhat arbitrarily initialized the stack pointer to 0x80400000 for now and properly allocated space for the stack later.
After initializing gp and sp, the code jumps to the Rust main function.
My main.rs file now looks like this:
#![no_std]
#![no_main]

mod paging;
mod sbi;

use core::arch::global_asm;
use core::ffi::c_int;
use core::panic::PanicInfo;

global_asm!(include_str!("head.S"), options(raw));

#[no_mangle]
pub extern "C" fn main() -> ! {
    for c in "Hello, world!\n".as_bytes() {
        sbi::console_putchar(*c as c_int);
    }
    // Shutdown the system.
    sbi::system_reset(0, 0);
    loop {}
}

#[panic_handler]
fn panic(_info: &PanicInfo) -> ! {
    loop {}
}
I pulled in the head.S file with the global_asm! macro, which is much more convenient than linking it separately since I don’t have to mess with the Rust build process.
My main function just loops over the bytes in “Hello, world!” and outputs them using an SBI wrapper function that I defined in another module.
It also calls the SBI function that shuts down the system so that I don’t have to manually stop QEMU every time.
The sbi.rs file contains the code that calls SBI functions using inline assembly:
use core::arch::asm;
use core::ffi::{c_int, c_long};

const EID_CONSOLE_PUTCHAR: i32 = 0x01;
const EID_SYSTEM_RESET: i32 = 0x53525354;

pub struct Sbiret {
    pub error: c_long,
    pub value: c_long,
}

pub fn console_putchar(ch: c_int) -> c_long {
    let ret;
    unsafe {
        asm!(
            "ecall",
            in("a7") EID_CONSOLE_PUTCHAR, in("a0") ch,
            lateout("a0") ret,
            options(nomem, preserves_flags, nostack),
        );
    }
    ret
}

pub fn system_reset(reset_type: u32, reset_reason: u32) -> Sbiret {
    let error;
    let value;
    unsafe {
        asm!(
            "ecall",
            in("a7") EID_SYSTEM_RESET, in("a6") 0, in("a0") reset_type, in("a1") reset_reason,
            lateout("a0") error, lateout("a1") value,
            options(nomem, preserves_flags, nostack),
        );
    }
    Sbiret { error, value }
}
Now I have a kernel that prints “Hello, world!”:
Conclusion
This is by far the most difficult “Hello, world!” program that I’ve ever written. I spent a lot of time on research, and after I started writing code it took me three whole days to get the output working. In the next post, I will be writing about how I initialized paging and enabled the memory management unit. Thanks for reading!